Genesis GV70 Vinyl Wrap Removal Review: Restored Original Paint
Service Price
$150+
Estimated price · Actual price may vary by shop

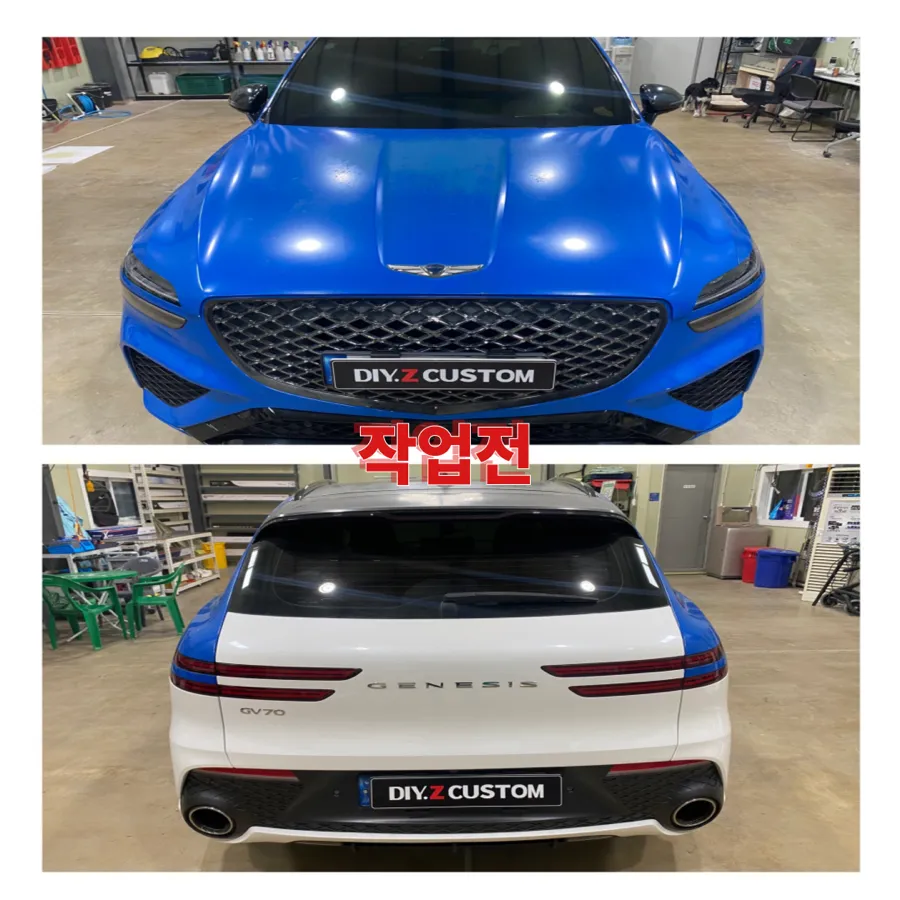
Genesis GV70 vinyl wrap removal: Restored original paint. See the detailed process and results.
Genesis GV70: The Art of Vinyl Wrap Removal and Paint Restoration
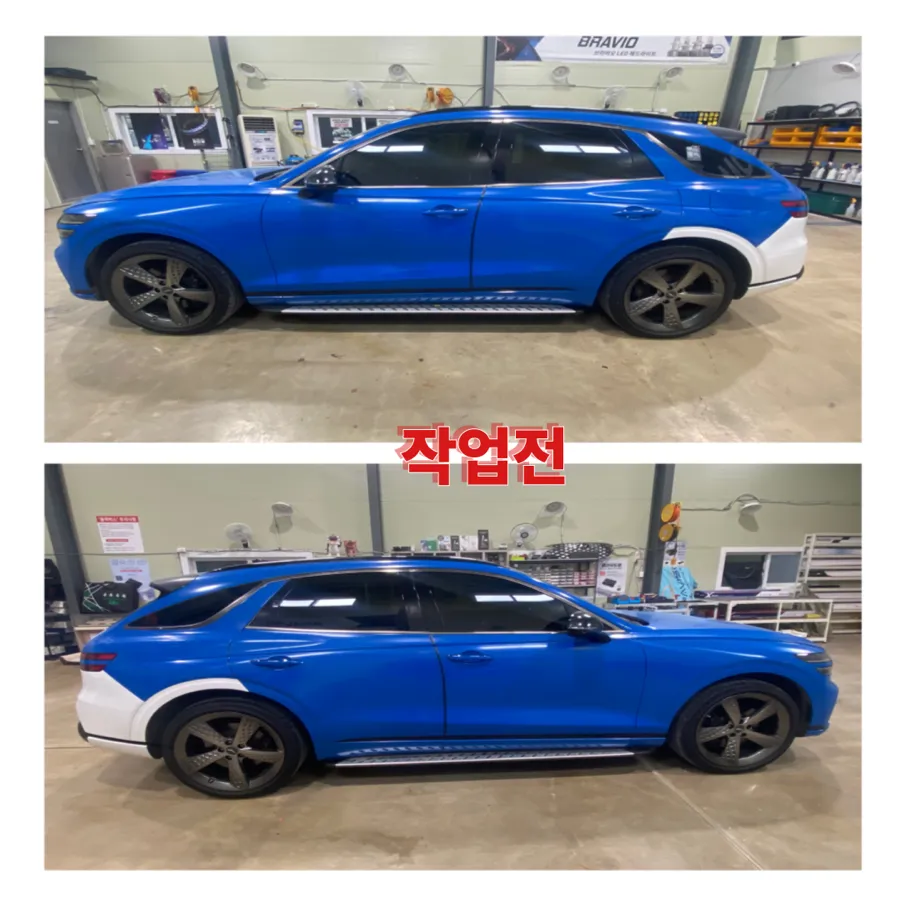
The Genesis GV70, with its signature flowing lines and intricate panel details, presents a unique challenge when it comes to vinyl wrap removal. Over time, wraps can begin to lift at the edges, fade, or even change color, detracting from the vehicle's premium aesthetic. In such cases, removing the vinyl wrap to restore the original paintwork becomes a necessary step. For vibrant finishes like the glossy blue on this GV70, the success of the restoration hinges on bringing back the paint's original luster.
This review details the process of removing a full vinyl wrap from a Genesis GV70, focusing on the glossy blue finish. We'll explore the specific considerations for this luxury SUV, the meticulous steps involved in the removal, the before-and-after transformation, and essential aftercare. Understanding the nuances of vinyl wrap removal is key to preserving your vehicle's appearance.
Understanding GV70 Body Characteristics and Wrap Removal Precautions
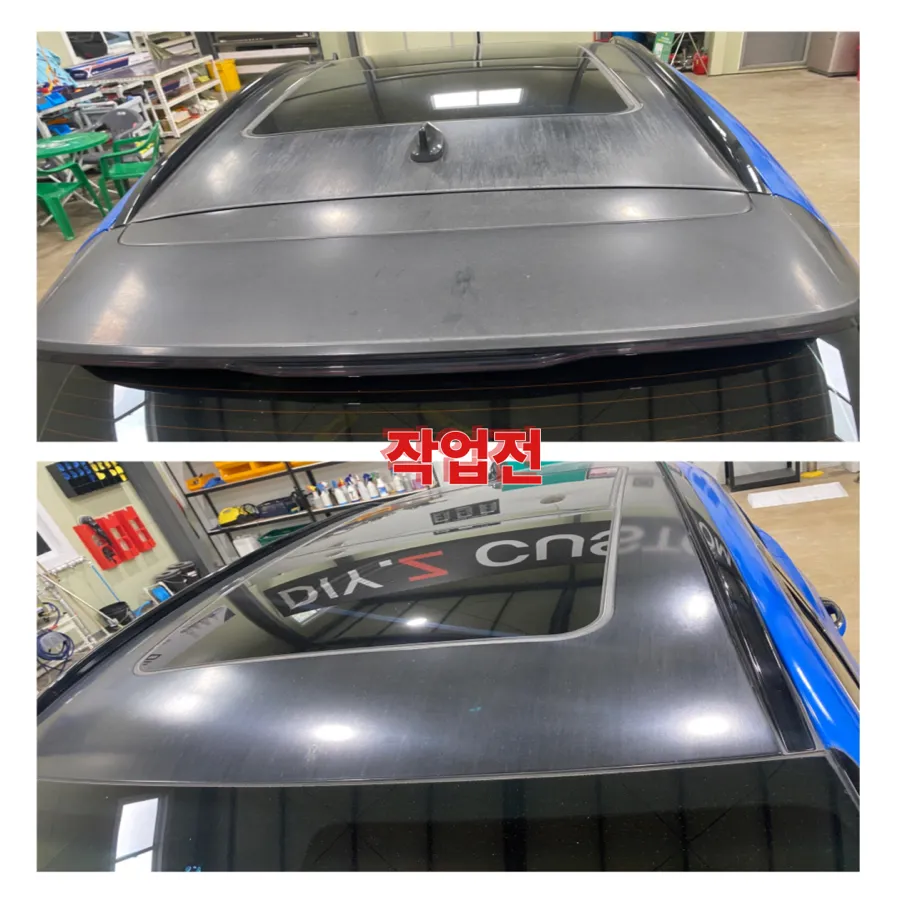
The Genesis GV70's body panels feature deeper, more complex curves than many other vehicles. The seamless transition between the side panels and the roofline requires a careful and even application of heat during the wrap removal process to prevent damage to the underlying paint. The glossy blue paint itself is a multi-coat finish, making it particularly sensitive to the heat and pressure involved in removing the vinyl.
Applying too much heat can cause the clear coat to peel, while incorrect angles during removal can lead to micro-scratches on the original paint. This is why experienced technicians and specialized equipment are not just recommended, but essential for a successful outcome. The intricate nature of the GV70's design means that each section must be treated with precision, paying close attention to the film's thickness and the adhesive's condition.
Glossy Blue Vinyl Wrap Removal: A Detailed 4-Step Process
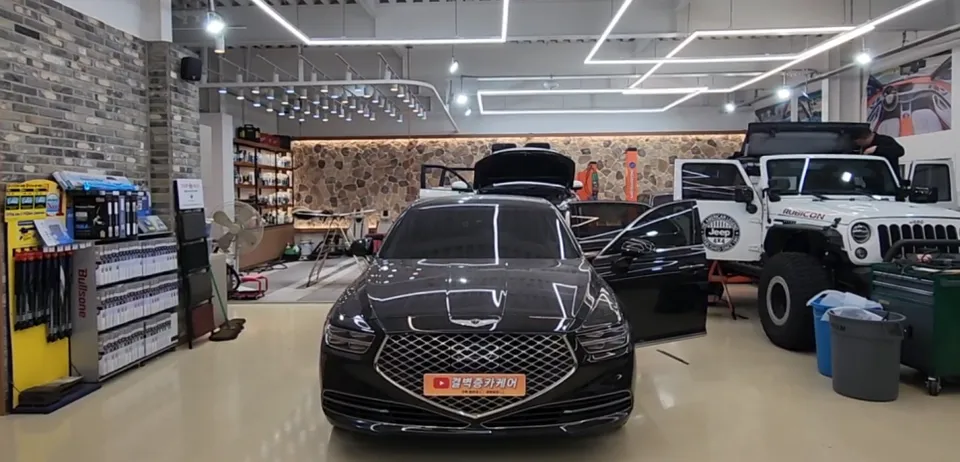
The removal of a full vinyl wrap, especially on a vehicle like the Genesis GV70, is a multi-stage process that demands patience and expertise.
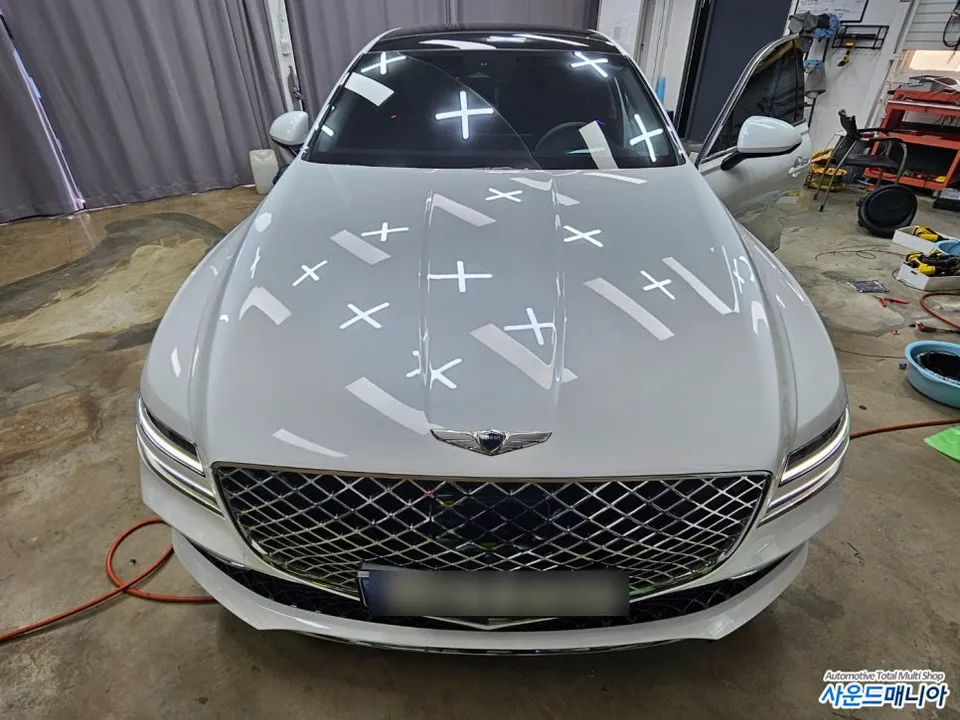
- Pre-Work Vehicle Inspection: The process begins with a thorough examination of the existing wrap. Technicians meticulously check for lifting edges, signs of discoloration, and the condition of the original paint underneath. Problem areas are documented with photographs. This initial assessment allows for a transparent discussion with the owner about the expected results and potential risks. Special attention is paid to challenging areas like door edges and trunk lines, where the film's thickness and adhesive properties can vary significantly.
- Heating and Film Peeling: Using a professional heat gun set to a precise temperature (around 60-80°C), the technician slowly applies heat to the edges of the vinyl wrap. The temperature must be carefully controlled; too hot, and the clear coat can be damaged; too cool, and the adhesive won't release properly. The heat is applied gradually and evenly across sections, with the temperature and duration adjusted based on the specific area. Once the adhesive softens, a plastic scraper is used to gently lift the edge of the film. This is a slow, deliberate process; pulling too quickly can lift the original paint along with the wrap. For the GV70's curved surfaces, this step often requires significant manual dexterity.
- Adhesive Residue Removal and Surface Cleaning: After the vinyl is removed, stubborn adhesive residue must be meticulously cleaned. This is typically done using a specialized adhesive remover. It's crucial to select a low-irritant product that won't damage the paint. The residue is gently wiped away with a microfiber cloth, a process that can take 5-10 minutes per section. The GV70's complex curves can make it difficult to spot all remaining adhesive, requiring careful inspection under good lighting from various angles to ensure a clean surface.
- Paint Restoration and Protective Coating: The final and most critical stage involves restoring the original paint's gloss. This is achieved through a polishing process (also known as paint correction). Polishing removes minor imperfections and restores the depth and shine of the original glossy blue finish. Following polishing, a protective coating, such as ceramic or a high-quality wax, is applied to shield the revitalized paintwork and enhance its longevity.
The entire process, from initial inspection to the final protective coating, requires a deep understanding of automotive paint and vinyl materials. The result is a stunning return to the GV70's factory finish, showcasing the beauty of its original glossy blue paintwork, free from the imperfections of a worn-out wrap.
Frequently Asked Questions
Q. How much does a vinyl wrap cost for a Genesis GV70?
This Genesis GV70 vinyl wrap removal cost is not specified, but typical vinyl wrap installations in the US can range from $2,000 to $5,000 depending on the vehicle and material.
Q. How long does a vinyl wrap last on a Genesis GV70?
Vinyl wraps typically last 3-5 years, depending on maintenance and environmental exposure. Regular washing and avoiding harsh chemicals will extend its lifespan.
Q. Does vinyl wrap damage paint on a Genesis GV70?
When removed properly by professionals, vinyl wrap should not damage the original paint on a Genesis GV70. However, improper removal or low-quality wraps can potentially lift or damage the clear coat.
OhCar Partner Shop
More vinyl wrap Reviews
See all →


More Genesis Reviews


Pair with Another Service
PPF edges before wrapping for durability
Coat over wrap for easier cleaning