Hidden Dash Cam Installation Guide for Mercedes-Benz E-Class
Hidden Dash Cam Installation Guide for Mercedes-Benz E-Class
If you own a Mercedes-Benz E-Class, protecting your vehicle with a dash cam is one of the smartest investments you can make. The challenge most owners face is finding the right Mercedes-Benz E-Class dash cam installation guide hidden option that doesn't compromise the car's sleek interior design. This comprehensive guide walks you through everything you need to know about installing a hidden dash cam in your E-Class, from selecting the right equipment to running wires discreetly throughout your vehicle.
The modern luxury sedan deserves a modern security solution, and a well-installed hidden dash cam provides exactly that. Whether you're concerned about accident documentation, theft prevention, or simply want peace of mind on the road, this installation guide will help you achieve a professional-looking result that integrates seamlessly with your Mercedes-Benz's premium interior.
Why a Hidden Dash Cam Makes Sense for Your Mercedes-Benz E-Class
Mercedes-Benz E-Class owners invest in their vehicles for the driving experience and the refined aesthetics. A visible dash cam mounted on the dashboard can detract from that luxury feel. A hidden installation preserves your car's interior design while still providing comprehensive security coverage.
Beyond aesthetics, hidden dash cams offer practical advantages. They're less likely to be noticed by potential thieves, which can actually deter break-ins. They also won't obstruct your view or distract from the road during your drive. According to our dash cam reviews, many E-Class owners appreciate the combination of functionality and discretion that hidden installations provide.
The investment in a quality dash cam with professional installation typically runs between $400 to $1,200 depending on the system you choose. For detailed pricing information, check out our dash cam installation cost guide, which breaks down expenses for various luxury vehicle installations.
Understanding Your Mercedes-Benz E-Class Dash Cam Installation Guide Hidden Options
There are several approaches to hiding a dash cam in your E-Class. The most popular methods include:
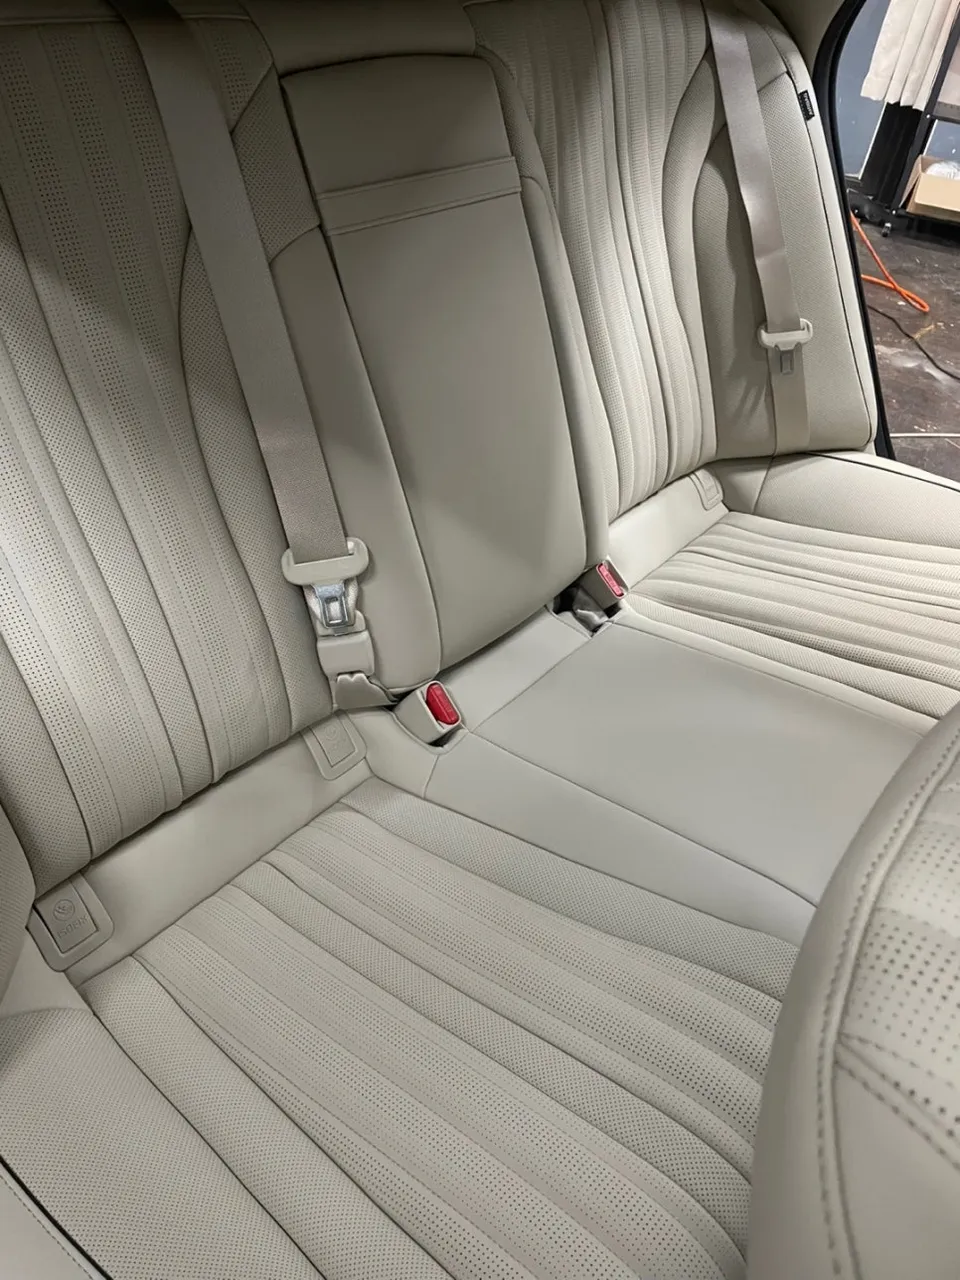
Behind the Rearview Mirror Installation
This is perhaps the most common hidden installation location. The space between the windshield and the rearview mirror provides the ideal mounting position for a compact camera. This placement gives you a clear forward view without any obstruction, and the camera lens sits perfectly centered for capturing the road ahead and lane markers.
In the Headliner/Roof Lining
For owners wanting maximum concealment, embedding the camera within the vehicle's headliner requires professional expertise. This method involves carefully removing the roof lining panels, running wiring through the roof structure, and integrating the camera seamlessly. It's the most labor-intensive option but delivers the most discreet result.
Inside the A-Pillar Trim
The A-pillar—the vertical trim piece at the front corner of your windshield—can sometimes accommodate a slim dash camera. This location provides excellent coverage and is virtually invisible to passengers.
Integrated into the Sun Visor Housing
Some aftermarket companies offer dash cameras designed to fit within or beside the sun visor area. This creative solution keeps the camera completely hidden when not in use.

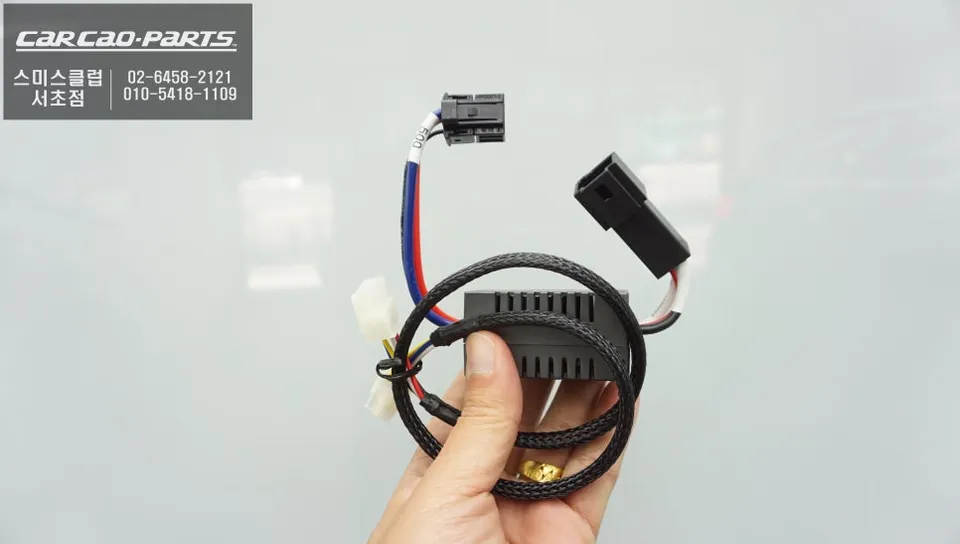
Tools and Materials You'll Need for Mercedes-Benz E-Class Dash Cam Installation Guide Hidden Setup
Before you begin, gather these essential items:
| Tool/Material | Purpose | Notes |
|---|---|---|
| Dash Cam Unit | Primary recording device | Choose compact models for hidden installation |
| Hardwire Kit | Power supply from vehicle battery | Essential for always-on recording |
| Panel Removal Tools | Safely remove interior trim | Plastic pry tools prevent damage |
| Fishing Wire/Rod | Route cables through tight spaces | Professional installers use 10-15 foot flexible rods |
| Adhesive Cable Clips | Secure wiring along trim edges | Use high-quality automotive-grade clips |
| Electrical Tape | Insulate connections | 3M or equivalent quality |
| Heat Shrink Tubing | Protect wire connections | Prevents short circuits and corrosion |
| Wire Strippers | Prepare wire ends for connections | Precision strippers minimize wire damage |
| Multimeter | Test electrical connections | Ensures proper power delivery |
| Interior Trim Adhesive | Resecure panels after installation | Use products designed for automotive trim |
Step-by-Step Hidden Dash Cam Installation for Your Mercedes-Benz E-Class
Step 1: Choose Your Power Source and Plan Your Route
The first critical decision is determining how your dash cam will receive power. You have three main options: direct battery connection (hardwired), cigarette lighter outlet, or USB connection through the center console. For a truly hidden installation, hardwiring to your vehicle's electrical system is the most professional approach.
Study your E-Class's electrical diagram to identify a suitable connection point. Many installers tap into the fuse box behind the driver's side dashboard. This provides consistent power whether your engine is running or off. Plan your wiring route before making any connections—sketch it on paper and trace the path through the vehicle to identify potential obstacles.
Step 2: Remove Interior Trim Panels Carefully
Start by removing the A-pillar trim on the driver's side. Use plastic pry tools rather than metal screwdrivers to avoid scratching your E-Class's premium interior. The panels typically have clips that release with gentle, steady pressure. Take photos as you go—these reference images prove invaluable when reassembling everything.
Next, carefully remove the headliner panels around your chosen camera location. Mercedes-Benz E-Class headliners are typically secured with a combination of clips and adhesive. Work slowly and apply gentle heat with a heat gun if necessary to loosen stubborn adhesive without damaging the material.

Step 3: Run the Power Cable
This is where precision matters. Using your fishing rod or wire routing tool, carefully thread the hardwire cable from your camera location toward the fuse box. The goal is to keep the cable hidden along existing trim lines and under the headliner whenever possible. In the E-Class, you'll thread along the A-pillar, across the top of the windshield frame, and down the driver's side of the dashboard.
Secure the cable with adhesive clips every 6-8 inches. Keep tension minimal—you don't want the cable pulling at the trim. Leave yourself a few inches of slack at connection points to account for vibration and temperature changes that occur during driving.
Step 4: Make Electrical Connections at the Fuse Box
This step absolutely requires attention to detail. Your E-Class has multiple fuse boxes—typically one in the engine bay and one behind the driver's side dashboard. For a dash cam hardwire, the interior fuse box is usually your best option.
Identify a suitable 12V constant power source using your electrical diagram. Your hardwire kit should include fuse adapters designed for your specific vehicle. Insert the adapter into the appropriate fuse slot, ensuring you're using a circuit that has constant power (doesn't turn off when the engine shuts down). Test with your multimeter to confirm proper voltage before proceeding.
Connect the ground wire to a clean metal surface on the vehicle's chassis. Many installers find the mounting points for interior trim panels ideal for ground connections. Ensure the surface is free of paint or corrosion for optimal contact.
Step 5: Mount Your Hidden Camera
Position your camera in your chosen hidden location. For the rearview mirror approach, use the adhesive mount or bracket system to secure the camera firmly. The camera should be level and centered to capture the complete road view. Aim the lens slightly downward to catch lane markings and potential hazards ahead.
If you're embedding the camera in the headliner, you may need to create a custom housing. Use materials that match your E-Class's interior color. Ensure proper ventilation around the camera unit to prevent heat buildup, which can affect video quality over time.
Step 6: Run the Video Cable
Your dash cam's video cable must reach from the camera to a display unit (if using one) or directly to the storage location. Following the same principles as the power cable, route this cable discreetly along trim lines and through the headliner space. Secure it with clips, keeping it hidden from view.
If you're using a rear-facing camera as part of a dual-camera system, you'll need to run that cable down the driver's side, under the door sill, and along the floor toward the trunk. This is more visible but can be concealed with protective trim covers designed for wire management.
Step 7: Install Any Display Module
Some dash cam systems include a small display screen for playback and settings adjustment. Position this in a location that's convenient for you but doesn't obstruct driving. Common locations include the lower corner of the windshield, near the steering column, or integrated into an existing trim piece.
Many modern systems use smartphone apps instead of physical displays, which eliminates the need for this step entirely. If you choose an app-based system, you'll only need to ensure your camera has access to your vehicle's wifi or uses Bluetooth connectivity.
Step 8: Reconnect All Interior Panels
With all wiring complete and tested, carefully reassemble your interior trim panels. Use the photos you took during disassembly as your reference guide. Apply adhesive trim clips or panel adhesive according to the panel type. Allow adequate time for adhesive to cure before operating your vehicle.
Clean any adhesive residue with appropriate solvents. Your E-Class's premium interior deserves care—use products designed for automotive interiors to avoid damage to leather, plastics, or trim finishes.
Hidden Dash Cam System Options for Mercedes-Benz E-Class Owners
Based on 3 owner reviews on OhCar, Mercedes-Benz E-Class owners have tested various dash cam configurations for hidden installation. The most frequently selected systems share several characteristics:
Compact Single-Camera Systems
These are ideal for owners who want simplicity and minimal aesthetic impact. Compact front-only cameras from reputable manufacturers offer 1080p to 4K resolution, often with parking mode recording for security while your car is parked. These systems require minimal wiring and are the easiest to hide.
Dual-Camera Systems
More comprehensive protection comes from systems with both forward and cabin-facing cameras. While these require more complex installation with additional wiring, they provide complete documentation of any incidents. Forward cameras capture external road conditions, while cabin cameras record interior activity—particularly valuable if you ever use rideshare or leave your vehicle with valet services.
360-Degree Camera Systems
The ultimate in coverage, 360-degree systems use multiple cameras positioned around your E-Class to capture comprehensive surround-view recording. Hidden installation becomes quite complex, but the coverage is unmatched. These systems integrate well with Mercedes' existing surround-view camera systems in some model years.

Mercedes-Benz E-Class Dash Cam Installation Guide Hidden: Professional vs. DIY
Before you decide to tackle this project yourself, consider the trade-offs:
DIY Installation Advantages
- Cost savings of $200-$500 in labor fees
- Complete control over camera positioning and routing
- Opportunity to learn your vehicle's interior systems
- Flexibility in scheduling the work at your pace
DIY Installation Challenges
- Risk of damaging premium interior trim or wiring
- Time investment of 6-12 hours for a professional-quality job
- Potential electrical issues if connections aren't properly made
- Limited warranty support if something goes wrong
- Difficulty accessing tight spaces without proper tools
Professional Installation Advantages
- Warranty protection on both parts and labor
- Expert knowledge of your E-Class's specific systems
- Proper tools for safe panel removal and wiring routing
- Quality assurance testing before you take the vehicle home
- Time savings—typically completed in 4-6 hours
For most Mercedes-Benz E-Class owners, professional installation is worth the investment. The cost difference is modest compared to the value of your vehicle, and the peace of mind that comes with expert workmanship is invaluable.
Powering Your Hidden Dash Cam: Hardwiring vs. Cigarette Lighter
The power source you choose significantly impacts the functionality and appearance of your installation:
Hardwired Installation
Hardwiring connects directly to your vehicle's electrical system, typically through the fuse box. This provides:
- Continuous power for 24/7 recording capability
- Parking mode features that monitor your car even when parked
- Professional appearance with no visible wiring
- Slightly higher installation complexity
Cigarette Lighter/12V Outlet Connection
This simpler approach plugs into your E-Class's existing power outlets. Benefits include:
For a truly hidden installation in your E-Class, hardwiring is the superior choice. The extra effort delivers significantly better results.
Protecting Your Video Footage and Data Security
Once your dash cam is installed, protecting your footage becomes important. Consider these aspects:
Storage Solutions
Most dash cams use microSD cards with capacities from 32GB to 512GB. Higher capacity cards provide more storage, but they also require longer write times. For hidden E-Class installations, you'll want a card with fast write speeds (minimum U3, V30 rating) to handle continuous 4K recording.
Cloud Backup Options
Some modern dash cams offer cloud integration for automatic backup of critical footage. This provides protection against theft or accidental deletion. Cloud options typically require a paid subscription, but they offer peace of mind for important recording events.
Privacy and Legal Considerations
Before installing a cabin-facing camera, check your local and state laws regarding in-vehicle recording. Some jurisdictions have specific regulations about recording audio or video inside a vehicle. This is particularly important if you use your E-Class for rideshare or frequently transport passengers.
Common Installation Mistakes to Avoid
Inadequate Cable Routing
Loose cables can rattle, become visible, or get pinched by moving panels. Always secure cables with clips and route them along existing trim lines to prevent these issues.
Poor Electrical Connections
Inadequate insulation or loose connections can cause intermittent power loss or electrical shorts. Use quality materials and test all connections with a multimeter before reassembling panels.
Improper Camera Positioning
A camera that's tilted, positioned too high, or too low will fail to capture important details in accident situations. Spend time getting positioning exactly right before permanent installation.
Neglecting Fuse Protection
Always use properly rated fuses in your hardwire kit. An undersized fuse creates fire risk; an oversized fuse fails to protect your system. Match the fuse rating to your specific dash cam's power requirements.
Skipping the Test Drive
Before considering your installation complete, take your E-Class on a test drive. Verify that recording begins automatically, that video quality meets expectations, and that no warning lights appear on your dashboard.
Maintenance and Troubleshooting Your Hidden Dash Cam System
Regular Maintenance Tasks
- Monthly: Check that the camera lens is clean and free of condensation
- Quarterly: Review recorded footage to ensure quality hasn't degraded
- Every 6 months: Inspect cables for damage or loosening, verify power connections
- Annually: Update firmware if your system supports it, replace microSD cards if they're approaching capacity limits
Troubleshooting Common Issues
Camera not recording: Verify that power is reaching the unit using your multimeter. Check that the microSD card is properly inserted and has sufficient free space.
Intermittent power loss: This usually indicates a loose connection at the fuse box or ground point. Re-examine these connections and ensure they're tight and free of corrosion.
Poor video quality: A dirty lens or improper camera angle are common causes. Clean the lens with a microfiber cloth and adjust the camera position if necessary. Also consider the lighting conditions during recording—dash cams typically perform better in daylight.
Overheating: If your camera shuts down during use, it may be overheating. Ensure adequate ventilation around the unit. Some users add small cooling fans or adjust the camera location to improve airflow.
Integrating Your Dash Cam with Mercedes-Benz Technology
Modern Mercedes-Benz E-Class vehicles include sophisticated onboard computer systems. Your hidden dash cam can complement these systems:
Integration with COMAND System
Some aftermarket dash cam systems can integrate with your vehicle's COMAND infotainment system, displaying camera status on your dashboard display. This provides convenient access to settings without requiring a separate display unit.
Smartphone App Integration
Most modern dash cams include smartphone apps allowing you to review footage, adjust settings, and monitor your vehicle remotely. This integration is particularly useful if your camera has parking mode capabilities—you can check on your vehicle while away.
Geotagging and Trip Recording
Advanced systems use your E-Class's GPS to tag recorded footage with location data. This proves valuable when documenting specific incidents and helps organize your recorded content chronologically.
Comparing Installation Costs and Options
For detailed information about dash cam installation expenses specific to luxury vehicles, check out our dash cam installation cost guide, which breaks down component costs and labor rates for hidden installations on premium vehicles like the Mercedes-Benz E-Class.
Typical cost breakdowns for E-Class hidden installations include:
| Component | Estimated Cost | Notes |
|---|---|---|
| Dash Cam Unit (4K) | $300-$600 | Brand and features affect price |
| Hardwire Kit | $30-$80 | Vehicle-specific kits recommended |
| Professional Installation | $300-$500 | Varies by shop and complexity |
| Additional Accessories | $50-$150 | Storage cards, protective covers, etc. |
| Total Range | $680-$1,330 | Professional hidden installation |
For additional vehicle protection strategies, explore our PPF vs Ceramic Coating comparison to understand how paint protection complements your dash cam security system for comprehensive vehicle care.
Warranty and Insurance Considerations
Installing a dash cam in your Mercedes-Benz E-Class generally won't void your manufacturer's warranty, provided the installation doesn't involve modification of your vehicle's primary systems. However, verify this with your dealership before proceeding.
From an insurance perspective, dash cam footage can significantly support your claims in accident situations. Some insurance companies offer modest discounts for vehicles equipped with dash cams. Check with your insurer to see if you qualify for any premium reductions that might offset your installation costs.
Staying Updated on Dash Cam Technology
Dash cam technology evolves rapidly. Newer systems offer improved 4K and 8K recording, better low-light performance, and enhanced AI features like lane-departure detection. For the latest information on dash cam options and technologies, visit our OhCar Magazine for comprehensive reviews and technology updates.
Final Thoughts on Mercedes-Benz E-Class Dash Cam Installation Guide Hidden
A well-executed hidden dash cam installation enhances your Mercedes-Benz E-Class's security without compromising its refined aesthetics. Whether you choose to DIY or work with professionals, the key is careful planning, quality components, and precise execution.
Your E-Class is a valuable investment worthy of comprehensive protection. A hidden dash cam provides documentary evidence in accident situations, deters theft through visible deterrence, and offers peace of mind during every drive. Take your time with the installation, test everything thoroughly, and enjoy the security that comes with professional-grade vehicle protection.
The choice to install a hidden dash cam in your Mercedes-Benz E-Class ultimately comes down to your priorities and comfort level with vehicle modifications. Either way, you're making a smart decision to protect your investment and ensure you have documentation for any on-road incidents. Drive safely and with confidence knowing your journey is recorded.

Comments (2)
Not a Mercedes guy, but I did the same thing with my Model 3 and honestly the hardest part was running the wire cleanly through the headliner without it showing. Just FYI for anyone doing this - use the existing cable channels near the A-pillar and you'll save yourself hours of headache.
Not really relevant to my Tahoe, but I gotta say the wiring part would be a nightmare in a Mercedes - those German cars are so picky about aftermarket stuff. I just slapped a Viofo on my dashboard with the adhesive mount and called it a day, way easier than going through all that hidden install nonsense.


Explore Related Services on OhCar