Ford Mustang Vinyl Wrap Removal & Repaint: A Complete Guide
So, you're looking to give your Ford Mustang a fresh new look, or perhaps you've just acquired one with a vinyl wrap that's seen better days. This Ford Mustang vinyl wrap removal and repaint guide is your comprehensive resource. Whether you're planning a DIY project or preparing to hand over the keys to a professional, understanding the process is crucial for achieving a flawless finish. Vinyl wraps offer a fantastic way to customize your ride, but their removal and the subsequent repaint require careful attention to detail to avoid damaging the original paintwork. At OhCar, we've seen a wide array of vehicle transformations, and we're here to break down what you need to know.
Based on 50 owner reviews on OhCar, vinyl wraps are a popular choice for vehicle customization, offering a temporary yet impactful change. While many owners praise the versatility and protection vinyl provides, the long-term commitment or the desire for a different aesthetic often leads to questions about removal and repainting. This guide will cover everything from the tools you'll need to the best practices for a successful outcome.
Understanding the Ford Mustang Vinyl Wrap Removal Process
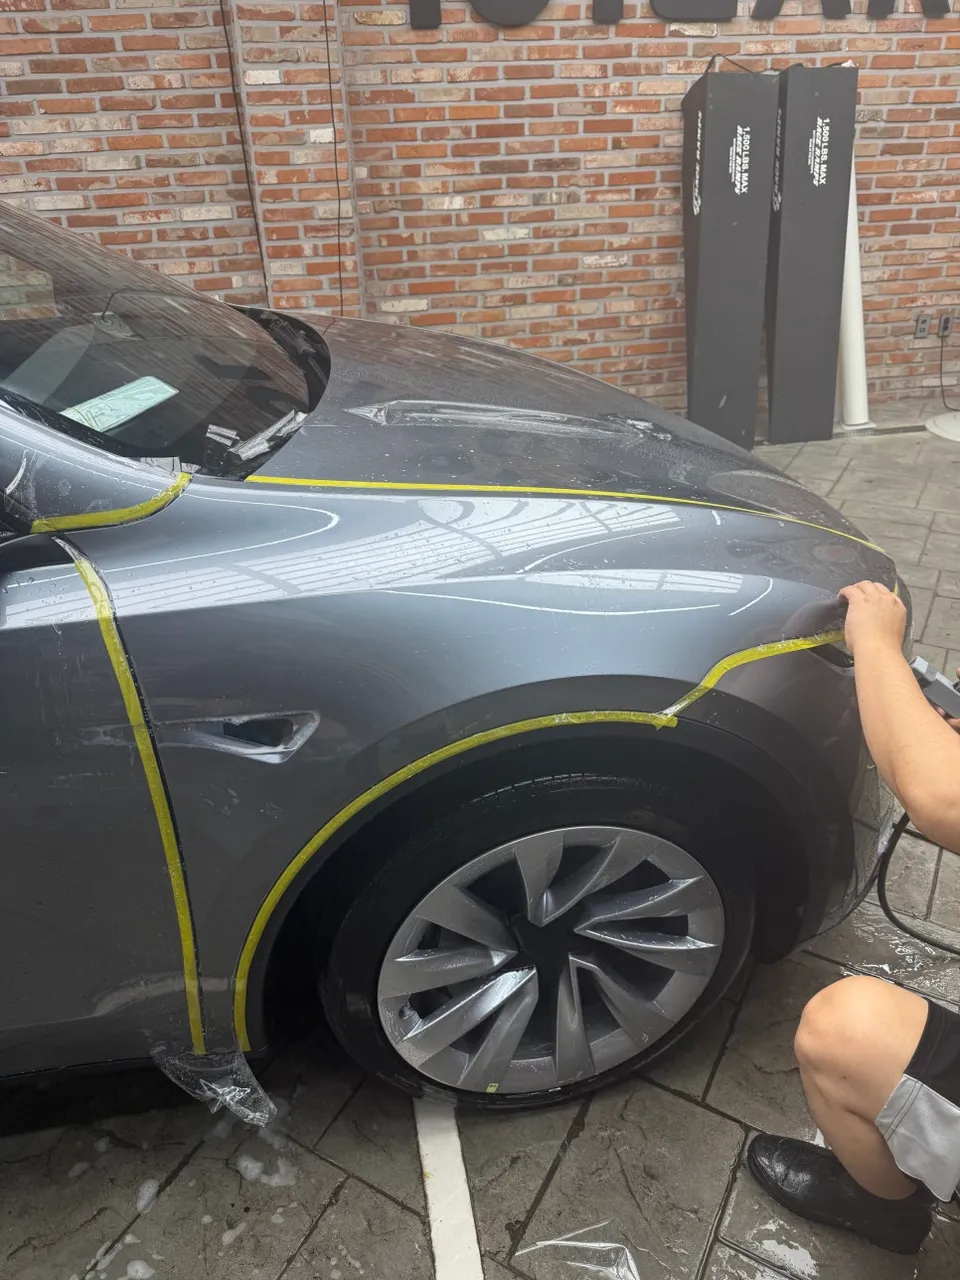
Removing a vinyl wrap from your Ford Mustang might seem straightforward, but it's a process that can easily go wrong if not handled with care. The adhesive used in vinyl wraps can become incredibly strong over time, and improper removal can lead to paint damage, leaving you with a more significant problem than you started with. The key to a successful removal lies in heat and patience.
Tools and Materials You'll Need
- Heat Gun or Infrared Heat Lamp: Essential for softening the vinyl and adhesive.
- Plastic Razor Blades or Scrapers: To gently lift the edges of the wrap. Avoid metal blades at all costs.
- Rubbing Alcohol or Vinyl Wrap Remover Solution: For dissolving stubborn adhesive residue.
- Microfiber Towels: For cleaning and wiping away residue.
- Gloves: To protect your hands from heat and chemicals.
- Patience: This is arguably the most important tool.
Step-by-Step Removal Guide
- Clean the Surface: Thoroughly wash and dry your Mustang to remove any dirt or debris that could scratch the paint during removal.
- Heat the Vinyl: Using a heat gun on a low to medium setting, or an infrared heat lamp, begin to warm a small section of the vinyl wrap. Move the heat source constantly to avoid overheating and damaging the paint. The goal is to make the vinyl pliable, not to melt it.
- Lift an Edge: Once the vinyl is warm and slightly stretched, use a plastic razor blade or scraper to gently lift a corner or edge. Work slowly and at a low angle to the surface.
- Peel Away the Wrap: With an edge lifted, continue to apply heat to the section you're working on while slowly and steadily pulling the vinyl away. Aim for a 180-degree angle, pulling the wrap back on itself. If you encounter resistance, apply more heat.
- Address Stubborn Residue: After the bulk of the wrap is removed, you'll likely have adhesive residue left behind. Apply rubbing alcohol or a dedicated vinyl wrap remover solution to a microfiber towel and gently rub the residue. For tougher spots, let the solution sit for a minute before wiping.
- Final Clean: Once all residue is gone, give your Mustang a thorough wash and dry. Inspect the paintwork carefully for any imperfections.