Mercedes-Benz E-Class Dash Cam Installation Guide: A Comprehensive How-To
Welcome to OhCar Magazine, your trusted source for all things automotive detailing and accessories! Today, we're diving deep into a topic that's becoming increasingly essential for modern drivers: the Mercedes-Benz E-Class dash cam installation guide. Whether you're looking to enhance your safety on the road, protect yourself from fraudulent claims, or simply capture those unexpected moments, a dash cam is an invaluable addition to your E-Class. While our database shows a diverse range of dash cam and navigation system reviews, including installations on vehicles like the 10th Gen Honda Accord and Peugeot 5008, the core principles of a clean, professional installation remain consistent across premium vehicles like your Mercedes-Benz E-Class.
Installing a dash cam in a luxury vehicle like the Mercedes-Benz E-Class requires a bit more finesse than a simple plug-and-play setup. You want an installation that's not only functional but also aesthetically pleasing, seamlessly integrating with your car's sophisticated interior. This guide will walk you through every step, from choosing the right dash cam to hardwiring it for a truly integrated experience.
Why Install a Dash Cam in Your Mercedes-Benz E-Class?
The reasons for adding a dash cam to your E-Class are numerous and compelling. Beyond the obvious benefit of recording accidents, a dash cam offers peace of mind and tangible advantages:
- Accident Documentation: Provides irrefutable video evidence in case of an accident, simplifying insurance claims and determining fault.
- Parking Monitoring: Many modern dash cams offer parking mode, recording incidents when your car is parked, protecting against hit-and-runs or vandalism.
- Theft Deterrence: The visible presence of a dash cam can deter potential thieves or vandals.
- Road Trip Memories: Capture scenic drives and unexpected moments on your journeys.
- Protection Against Fraud: Helps protect you from 'crash-for-cash' scams.
Based on 4 owner reviews on OhCar, the sentiment around dash cams consistently highlights their role as a 'safety driving essential.' While specific price ranges for dash cams vary widely depending on features like 4K resolution, cloud connectivity, and parking mode capabilities, you can generally expect to find quality units ranging from $100 to $500, with professional installation adding to that cost. For a deeper dive into what to expect, check out our dash cam installation cost guide.
Choosing the Right Dash Cam for Your Mercedes-Benz E-Class
Before we get to the installation, selecting the right dash cam is crucial. Consider these factors:
Key Features to Look For:
- Resolution: 1080p Full HD is a minimum; 2K or 4K offers superior clarity for capturing license plates and details.
- Channels: Single-channel (front only) or dual-channel (front and rear) for comprehensive coverage. Some even offer interior recording.
- Parking Mode: Essential for protecting your E-Class while parked. Look for buffered recording (records before and after an event) and low-power consumption.
- GPS: Records speed and location data, useful for accident reconstruction.
- Wi-Fi/Cloud Connectivity: Allows you to view footage on your smartphone and, with cloud, access it remotely.
- Capacitor vs. Battery: Capacitors are generally preferred for dash cams as they are more resistant to extreme temperatures, which is important for a device constantly exposed to sunlight.
- Discreet Design: For a luxury car like the E-Class, a small, unobtrusive dash cam that blends into the interior is often preferred.
While our database shows '기타' (meaning 'other' or 'miscellaneous') as the brand for many reviewed dash cams, indicating a wide variety of options, popular reputable brands include BlackVue, Thinkware, VIOFO, and Garmin. We encourage you to explore our dash cam reviews for user experiences and detailed insights into various models.
Mercedes-Benz E-Class Dash Cam Installation Guide: Step-by-Step
This guide focuses on a hardwired installation, which provides a clean, integrated look and enables parking mode functionality. If you prefer a simpler, temporary setup, you can use the cigarette lighter adapter, but be aware this will only power the dash cam when the car is on.
Tools and Materials You'll Need:
- Your chosen dash cam (front and/or rear)
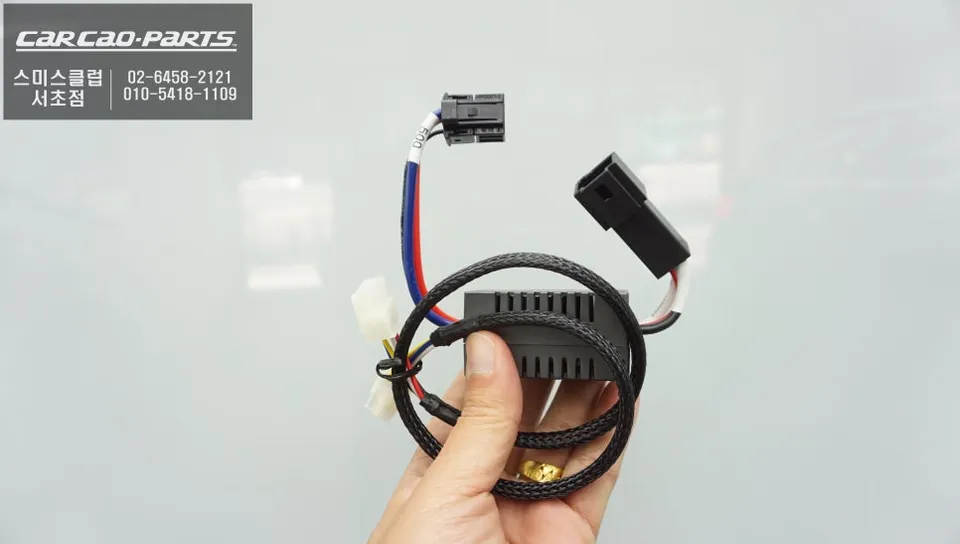
- Hardwiring kit (specific to your dash cam model)
- Fuse tap adapters (Mini, Low Profile Mini, or ATO/ATC – check your E-Class fuse box for compatibility)
- Wire stripper/crimper
- Multimeter or circuit tester
- Plastic trim removal tools
- Zip ties or cable clips
- Microfiber cloth and glass cleaner
- Optional: Add-a-circuit fuse holder for a cleaner fuse box connection
Safety First:
Always disconnect the negative terminal of your car battery before working with electrical components. This prevents accidental shorts and ensures your safety. Consult your E-Class owner's manual for battery location and disconnection procedures.
Step 1: Planning and Placement
This is arguably the most critical step for a professional-looking installation. Consider the following:
- Front Camera: Position it behind the rearview mirror, centered on the windshield. This provides the best field of view and keeps it out of your direct line of sight. Ensure it doesn't obstruct any sensors (rain, light, ADAS) or the toll tag area.
- Rear Camera (if applicable): Mount it high on the rear window, centered, ensuring it doesn't interfere with the defroster lines or wiper sweep.
- Cable Routing: Visualize the path for all cables (power, rear camera cable) to ensure they can be neatly tucked away along the headliner, A-pillar, and under the dashboard.
Step 2: Mount the Front Dash Cam
- Clean the chosen area on the windshield thoroughly with glass cleaner and a microfiber cloth.
- Peel off the adhesive backing from the dash cam mount.
- Carefully align the dash cam and press firmly onto the windshield for at least 30 seconds. Allow the adhesive to cure for a few hours (or as recommended by the manufacturer) before attaching the camera body.
- Once cured, attach the dash cam body to the mount.
Step 3: Route the Power Cable (Front Camera)
This is where the trim removal tools come in handy for a stealthy installation.
- Start by tucking the power cable into the headliner, working your way from the dash cam towards the A-pillar on the passenger side. Use a trim tool to gently pry open the headliner edge and push the cable in.
- Carefully remove the passenger-side A-pillar trim. Most E-Class models have clips that release with gentle prying. Be mindful of any airbags behind the trim. Route the cable down the A-pillar, securing it with zip ties to existing wiring harnesses to prevent rattles.
- Continue routing the cable under the dashboard towards the passenger footwell fuse box. This usually involves tucking it behind the glove box or other trim panels.
Step 4: Install the Rear Dash Cam and Route Its Cable (if applicable)
- Mount the rear camera on the rear window, similar to the front camera.
- Route the rear camera cable along the headliner from the rear window towards the front. This will involve tucking it into the headliner, down the C-pillar, along the door sills, up the B-pillar, and finally along the headliner to meet the front camera. This can be the most time-consuming part, requiring patience and careful trim removal.
- Connect the rear camera cable to the front dash cam unit.
Step 5: Hardwiring to the Fuse Box
This step requires a bit of electrical know-how. If you're uncomfortable, consider professional installation. Your E-Class will likely have a fuse box in the passenger footwell or under the hood.
- Locate the Fuse Box: Consult your E-Class owner's manual to find the fuse box location. The passenger footwell fuse box is usually the easiest to access for dash cam hardwiring.
- Identify Fuse Types: Determine the type of fuses your E-Class uses (e.g., Mini, Low Profile Mini, ATO/ATC) to ensure you have the correct fuse tap adapters.
- Find Power Sources: You'll need two power sources for most hardwiring kits: a constant power (B+) source (always on, for parking mode) and an accessory power (ACC) source (on only when the ignition is on).
- Constant Power: Use your multimeter or circuit tester to find a fuse that has power even when the car is off. Common choices include fuses for interior lights, hazard lights, or the trunk release.
- Accessory Power: Find a fuse that only has power when the ignition is on. Fuses for the radio, cigarette lighter, or infotainment system are often good candidates.
- Connect the Hardwiring Kit:
- Attach the constant power wire from your hardwiring kit to a fuse tap. Insert an existing fuse (of the same amperage) into the bottom slot of the fuse tap, and a new, lower-amperage fuse (e.g., 2A or 3A, as specified by your dash cam) into the top slot.
- Repeat for the accessory power wire with another fuse tap.
- Plug the fuse taps into the identified fuse slots in your E-Class fuse box.
- Connect the ground wire from the hardwiring kit to a suitable metal bolt or screw on the car's chassis. Ensure it's a clean, unpainted metal surface for a good connection.
Step 6: Test the Installation
- Reconnect the negative terminal of your car battery.
- Start your E-Class and check if the dash cam powers on.
- Turn off the ignition and lock the car. After a few minutes, check if the dash cam enters parking mode (if applicable).
- Verify that the dash cam is recording correctly and that all settings are configured as desired.
Step 7: Final Tidy-Up
Once you've confirmed everything is working, secure all loose cables with zip ties or cable clips. Reinstall any removed trim panels, ensuring they are properly seated and no wires are pinched. The goal is a clean, factory-like finish.

Common Challenges and Troubleshooting for Mercedes-Benz E-Class Dash Cam Installation
Even with a detailed guide, you might encounter a few hiccups. Here are some common issues and solutions:
- Dash Cam Not Powering On:
- Check fuse connections: Ensure fuse taps are fully seated and fuses are intact.
- Verify ground connection: Make sure the ground wire is securely attached to a clean metal surface.
- Test power sources: Use a multimeter to confirm power at the fuse taps.
- Parking Mode Not Working:
- Incorrect power source: Ensure the constant power wire is connected to a fuse that is always on.
- Low voltage cut-off: Your hardwiring kit might have a low voltage cut-off setting. If your car battery voltage drops below this, the dash cam will shut off to protect the battery. Adjust the setting or consider a dedicated dash cam battery pack.
- Cable Rattles:
- Use more zip ties or foam tape to secure cables within trim panels.
- Ensure cables are not pinched or rubbing against hard surfaces.
- Interference with Car Electronics:
- While rare, some dash cams can cause minor interference. Ensure the dash cam and its cables are not too close to sensitive electronic modules.
- Try a different power source if you suspect interference.
For more general tips and tricks on car care and accessories, be sure to browse our OhCar Magazine for a wealth of articles, including comparisons like our PPF vs Ceramic Coating comparison, which can help you protect your E-Class's exterior as well as its interior.
When to Consider Professional Installation
While this Mercedes-Benz E-Class dash cam installation guide provides comprehensive steps, hardwiring a dash cam, especially in a sophisticated vehicle like the E-Class, can be daunting for some. If you're not comfortable working with your car's electrical system, or if you want absolute assurance of a flawless, warranty-safe installation, professional installation is highly recommended. A professional installer will have the experience, specialized tools, and knowledge of your E-Class's specific wiring diagrams to ensure a perfect, discreet setup.
Professional installation costs can vary, typically ranging from $75 to $200, depending on the complexity (front only vs. front and rear, parking mode requirements) and the installer's rates. This investment often pays off in peace of mind and a perfectly integrated system.

Conclusion
Installing a dash cam in your Mercedes-Benz E-Class is a smart decision that enhances safety, provides security, and offers invaluable peace of mind. By following this detailed guide, you can achieve a clean, professional-looking hardwired installation that seamlessly integrates with your luxury vehicle. Remember to take your time, prioritize safety, and don't hesitate to seek professional help if you encounter any difficulties. Drive safely, and enjoy the added security your new dash cam provides!

Comments (2)
This is a great guide! I actually just wrapped my E-Class in a satin black, so I've been looking for a good dash cam that won't mess with the aesthetic. Hardwiring is definitely the way to go for that clean look.
Man, I wish my Tahoe was that easy to hardwire a dash cam into. I had to get a pro to do it for my BlackVue, and even then it took a while to snake those wires around the airbags and everything. Worth it for the peace of mind though, especially with all the crazy drivers down here in Florida.

Explore Related Services on OhCar