Dash Cam Hardwiring Guide — Parking Mode Setup Step by Step
Welcome to OhCar! If you're looking to enhance your vehicle's security and recording capabilities, a dash cam is a fantastic investment. This dash cam wiring guide will walk you through the process of hardwiring your dash cam, focusing on setting up the essential parking mode. Many of our users in South Korea, from owners of popular models like the Kia Sorento and Hyundai Staria to premium vehicles like the Genesis G80 and Tesla Model 3, opt for hardwiring to unlock the full potential of their dash cams. Based on 50 owner reviews on OhCar, the average cost for dash cam installation, including hardwiring, ranges from approximately $800 to $1,500, with an average of $1,138. This guide is designed for a global audience, providing general steps applicable to most vehicles, while acknowledging that specific fuse box locations and panel removal techniques may vary by car model and region.
Why Hardwire Your Dash Cam?
While many dash cams come with a simple cigarette lighter adapter, hardwiring offers significant advantages, especially for parking mode functionality. The primary benefit is a cleaner installation, free from dangling wires. More importantly, hardwiring allows your dash cam to draw power directly from your vehicle's fuse box. This enables continuous power, even when the car is turned off, which is crucial for parking mode. Parking mode allows your dash cam to record events that happen around your vehicle while it's parked, such as impacts or motion detection, providing an extra layer of security. Without hardwiring, your dash cam would turn off with the ignition, rendering parking mode useless.
Understanding Parking Mode
Parking mode is a feature that allows your dash cam to remain active when your car is parked. There are generally two types of parking mode triggers:
- Impact Detection: Records a short clip when the dash cam detects a jolt or impact to the vehicle.
- Motion Detection: Records when motion is detected in front of the vehicle.
To utilize these features, your dash cam needs a constant power supply. This is where hardwiring becomes essential. It ensures that even when your car's ignition is off, the dash cam receives the necessary power to monitor your surroundings.
Dash Cam Hardwiring Guide: Tools and Materials You'll Need
Before you begin, gather the necessary tools and materials. Having everything ready will make the process smoother and safer.
- Dash Cam Hardwiring Kit: Most dash cams come with one, or you can purchase a universal kit. Ensure it's compatible with your dash cam's voltage requirements.
- Add-a-Fuse Kit (Fuse Tap): This is crucial for safely tapping into your car's fuse box. You'll need to match the fuse tap amperage to the circuit you're tapping into.
- Wire Strippers/Crimpers: For preparing and connecting wires.
- Electrical Tape or Heat Shrink Tubing: For insulating connections.
- Trim Removal Tools: Plastic tools designed to pry open interior panels without causing damage. Essential for accessing the fuse box and routing wires neatly.
- Screwdriver Set: For any screws that might be holding panels in place.
- Multimeter (Optional but Recommended): To identify constant and ignition-switched fuses.
- Zip Ties: For securing wires and keeping the installation tidy.
- Owner's Manual: Your vehicle's owner's manual will be invaluable for identifying fuse box locations and understanding your car's electrical system.
Step-by-Step Dash Cam Hardwiring Process
This guide provides a general overview. Always refer to your specific dash cam and vehicle manuals for detailed instructions.
Step 1: Locate Your Vehicle's Fuse Box
Most vehicles have at least one fuse box. Common locations include:
- Under the dashboard on the driver's side.
- In the glove compartment.
- Under the steering column.
- In the engine bay (less common for interior dash cam wiring).
Consult your owner's manual to find the exact location for your car. Once found, you may need to remove a plastic cover to access the fuses.
Step 2: Identify the Correct Fuses
This is a critical step. You need to find two types of fuses:
- Constant Power Fuse: This fuse provides power even when the ignition is off, essential for parking mode. Look for fuses related to the hazard lights, interior lights, or radio.
- Ignition Switched Fuse: This fuse only receives power when the ignition is on. This is used to turn the dash cam on and off with the car, preventing battery drain when parked if you're not using parking mode. Fuses for the power windows, cigarette lighter (sometimes), or infotainment system are good candidates.
Using a Multimeter: If you have a multimeter, you can test fuses. Insert the multimeter's probe into the back of the fuse slot (where the metal prongs are). With the ignition off, test for constant power. Then, turn the ignition on and test again. This will help you definitively identify which fuses are constant and which are ignition-switched.
Without a Multimeter: You can often identify potential fuses by looking at your fuse box diagram (usually on the cover or in the manual) and testing by trial and error. Connect the add-a-fuse to a potential fuse, connect the dash cam, and see if it powers on with the ignition and stays on (or turns off) as expected.
Step 3: Install the Add-a-Fuse (Fuse Tap)
Once you've identified your fuses, you'll use the add-a-fuse kit. These kits allow you to tap into an existing fuse circuit without disrupting it.
- Remove the original fuse from the chosen slot.
- Insert the original fuse into the lower slot of the add-a-fuse.
- Insert a new fuse (usually provided with the kit, matching the amperage requirements of your dash cam circuit) into the upper slot of the add-a-fuse.
- Plug the add-a-fuse into the empty fuse slot. Ensure the orientation is correct so that the fuse you're tapping into is protected by the add-a-fuse.
Repeat this process for both the constant power fuse and the ignition-switched fuse, using two separate add-a-fuse kits.
Step 4: Connect the Dash Cam Power Wires
Your dash cam hardwiring kit will typically have three wires:
- Constant Power (usually ACC or B+): Connect this wire to the constant power fuse using an add-a-fuse.
- Ignition Switched Power (usually ACC): Connect this wire to the ignition-switched fuse using another add-a-fuse.
- Ground (GND): This wire needs to be connected to a metal part of your vehicle's chassis. Look for a bare metal bolt or screw that is securely fastened to the car's frame. Avoid connecting to painted surfaces, as this will prevent a good ground connection.
Use your wire strippers and crimpers to securely connect the wires. Ensure all connections are insulated with electrical tape or heat shrink tubing to prevent short circuits.

Step 5: Route the Wires Neatly
This is where patience and trim removal tools come in handy. The goal is to hide all wires for a clean, professional look.
- Route the power cable from the fuse box area up towards your windshield. Use the trim removal tools to gently pry open sections of the dashboard, A-pillar trim, and headliner.
- Tuck the wires behind these panels. Be careful not to pinch any wires.
- Secure the wires with zip ties as you go to prevent them from rattling or coming loose.
- Connect the dash cam to the power cable and mount the dash cam in its desired location.
Many owners in South Korea, whether they drive a Hyundai Tucson or a Tesla Model 3, prioritize a clean installation. For instance, one OhCar Magazine review highlighted how meticulous wire routing significantly improved the aesthetic of a custom lighting upgrade.
Step 6: Test Your Installation
Before reassembling all panels, it's crucial to test your setup.
- Turn the ignition ON: Your dash cam should power up and begin recording.
- Turn the ignition OFF: The dash cam should either turn off (if not using parking mode) or enter parking mode (if configured).
- Check Parking Mode: If you've set up parking mode, try simulating an impact or motion to see if it records.
If everything works as expected, you can reassemble any panels you removed.
Troubleshooting Common Issues
Even with a detailed dash cam wiring guide, issues can arise. Here are a few common problems and their solutions:
- Dash Cam Not Powering On: Double-check all connections, especially the ground wire. Ensure the fuses are correctly seated in the add-a-fuse kits and that the correct fuses were selected.
- Dash Cam Powers On/Off Randomly: This could indicate a loose connection or a faulty fuse. Ensure all connections are secure and insulated.
- Parking Mode Not Engaging: Verify that the constant power wire is connected to a fuse that receives power even when the ignition is off. Check your dash cam's parking mode settings.
- Car Battery Draining: If your dash cam is drawing too much power in parking mode, it can drain your battery. Ensure you've used a fuse that is truly ignition-switched for the ACC wire if you don't intend to use parking mode, or consider a dash cam with a battery pack or voltage cutoff feature.
Dash Cam Brands and Price Context in South Korea
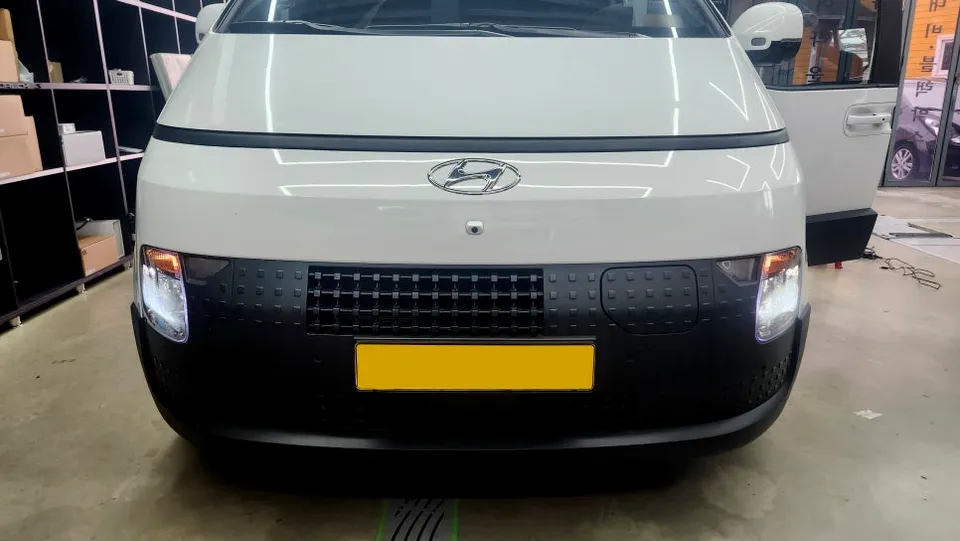
While this guide is general, it's worth noting the context of dash cam installations in South Korea, where OhCar is based. Popular brands include Thinkware, BlackVue, and iQnavi. Installation costs, as seen in our reviews, can vary significantly based on the complexity of the vehicle and the features desired. For example, a premium installation on a vehicle like a 2024 Kia Sorento or a Tesla Model 3 might involve more intricate panel work and integration, pushing the price towards the higher end of the $800–$1,500 range. Simpler installations on models like the Hyundai Staria ST1 might fall into the $750–$1,150 bracket. It's always recommended to get quotes from reputable shops.
| Vehicle Brand | Model Example | Approximate Price Range (USD) |
|---|---|---|
| Kia | Sorento (2024) | $1,500+ |
| Hyundai | Staria ST1 | $750 – $1,150 |
| Tesla | Model 3 | $1,500+ |
| Genesis | G80 | $1,500+ |
| Hyundai | Tucson | $400 – $800 (for tinting, dash cam install may vary) |
It's important to remember that these prices are based on installations performed by shops within our network in South Korea. While the techniques are universal, local labor rates and specific product availability can influence costs globally. For readers interested in other protective automotive treatments, our comparison of PPF vs Ceramic Coating offers insights into different vehicle protection options.
Conclusion
Hardwiring your dash cam is a rewarding process that unlocks its full potential, especially for parking mode surveillance. By following this dash cam wiring guide, you can achieve a clean, professional installation that enhances your vehicle's safety and security. Remember to always prioritize safety, consult your vehicle's manual, and take your time. If you're ever unsure, seeking professional installation from a reputable shop is always a wise choice.
Comments (2)
This is a great guide! I've been wanting to set up parking mode on my dash cam for ages, and this makes it seem much less intimidating. Thanks for breaking down the fuse box stuff so clearly.
This guide was super helpful! I was always a bit intimidated by the fuse box, but the explanations made it much clearer. My dash cam is finally set up for parking mode without a dangling cable.

Explore Related Services on OhCar